So where were we? Oh yea, I've got a new subframe to install.

So I start removing bits from the bike to get the broken subframe out and it's a lot of work there. As I go along I'm reminded that my bike is an AE and as such is so seamless that I often forget that it's not like every other FJR on the road. I'm reminded of this as I remove the AE actuator from it's mount point on the subframe. Then I think...hrm, that mount point wouldn't be on every FJR now would it? Realizing I didn't check when I ordered my subframe off Ebay to make sure it's an AE subframe, I feel the emotions welling up inside me. The frame is sitting behind me in the garage and I'm so angry I didn't check that I could spit nails, and at the same time I just want to cry.
Oh look, I do have SOME luck. It's an AE subframe. A quick check of my ebay history shows that it was listed as an AS subframe....same deal, different continent, but it'll work. I almost cry from joy. A man alone in his garage is sometimes an emotional deal.
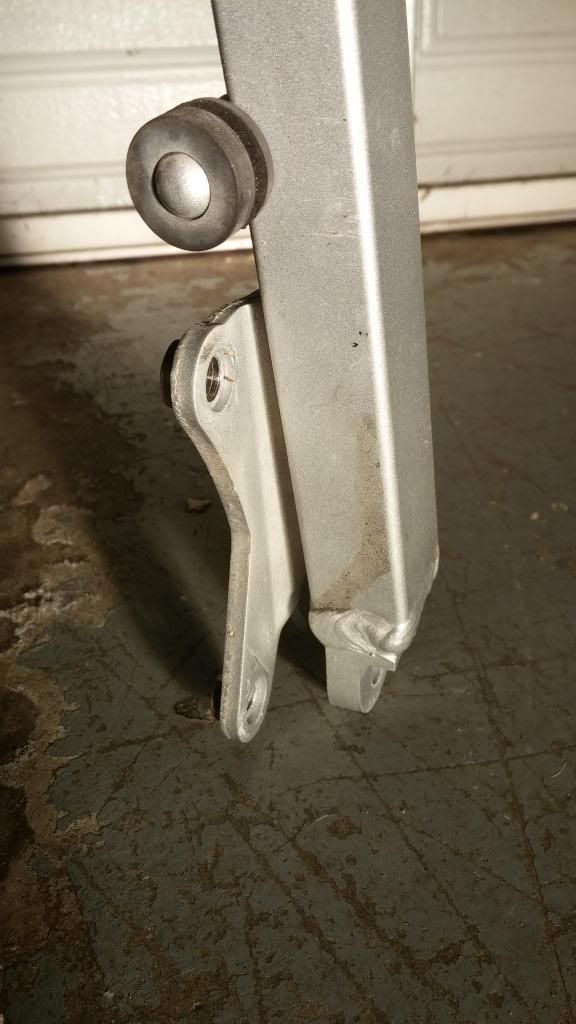
So, some interesting things I DID note when comparing them. My bike is a 2007 and the donor bike was a 2006. You'd think the subframes would be identical but in fact there are some interesting subtle differences between them. A little extra welding here on the mount point in question on the 2007

And here we have a comparison shot of broken next to unbroken.

Every once in a while I have a stroke of genius, and actually think and plan ahead. This was one of those times. The air filter is a huge pain to get to on the AE, so I figured while I have everything off, why not toss in a new air filter, it's needed anyway. Easy peasy...mostly. Yes, that's a spool of Christmas lights holding up the tail section to make things easier to work on. Tools can be made from anything.

I read where someone else did this that said they didn't have to remove the whole middle black plastic part. This is true, it requires more fiddling to pull the subframe off than you'd think but it can be done, which saves a LOT of work. It's already a lot of work to this point.

This is Gerauld's stiffy kit that I'm installing. It helps to beef up the rear quite a bit and will hopefully help to keep this from happening again.


This is what it will look like when it's fully installed. It's actually very hard to see when all the plastics are on.

Here's more shots of broken vs unbroken. This time it's the tail rack and grab rails next to the Givi SR357 that is much better able to handle the extra loads.


I'm working on some ideas to make the Shad case fit on the Givi rack. You can make it work, but I noticed that it sits further back on the rack than stock, so I think I want to change that. Working out some ideas.
On the plus side though, I'm riding again and very happy as this week spring has arrived.