Wednesday, October 9, 2013

hyphen problems in code

Today's painful IT lesson was on the difference between a hyphen, an en-dash and an em-dash.

While testing dynamic distribution lists I got stuck on the following two recipient filters, which look identical, and yet the first will run fine and the second one will error out.

-RecipientFilter {(RecipientType -eq "UserMailbox") -and (ExtensionCustomAttribute1 -like "Exchange")} -WhatIf
-RecipientFilter {(RecipientType -eq "UserMailbox") -and (ExtensionCustomAttribute1 –like "Exchange")} -WhatIf

Taking a closer look at the code, the actual problem is right here.

(ExtensionCustomAttribute1 -like "Exchange")
(ExtensionCustomAttribute1 –like "Exchange")

In most text editors the hyphen before the "like" appear to the human eye to be the same.

As it turns out, the first is a hyphen while the second one is an en-dash.  Some text editors such as Word will display them differently and even autocorrect during certain situations between one and the other.  They are however two completely different characters.

Pasting them into a text to html converter yields the following:

-
–

Pasting them into a text to ASCII converter yields the following:

045
226 128 147

Regardless, trying to figure out where in the code things went wrong and doing a visual comparsion in a text editor will drive you mad for sure.  I suppose the lesson is to be careful of what we use when we copy and paste.

Further reading on the subject can be found in the below article:
http://www.punctuationmatters.com/the-hyphen-dash-n-dash-and-m-dash/

Saturday, September 7, 2013

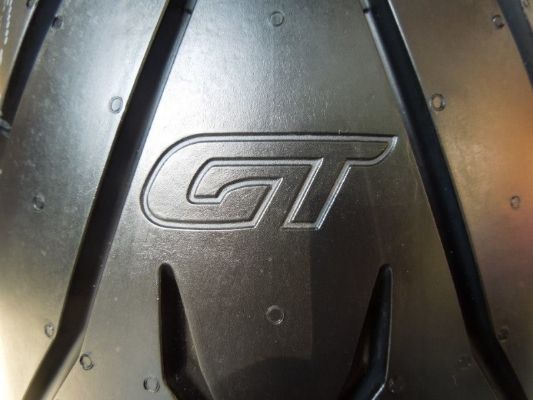
Pirelli Angel GT tires

Time for a tire change.  I finally got a chance to pretty well wear out a set of Michelin Pilot Road 2 tires.  Previously I had one that had picked up too many nails and been plugged too many times that I had to get rid of it.  Second set was on a bike I sold, so this set was the ones I finally wore out.  I got a pretty remarkable 13,510 out of them and was very happy with the performance of them.

So you might ask, why not another set of PR2's then?  I certainly would have if Pirelli had not offered up their "Fly Into Summer" promotion back in June.  They offered up their new Angel GT in a deal where if you buy a rear tire, you get a free front tire.  Normally a full set of tires will run $250-$300.  I ordered up my rear Angel GT from JakeWilson.com and it was $167.99 with free shipping.  Add onto that, Pirelli drop shipping me a front tire for free and that's a deal that cannot be beat.

With the old tires finally worn out it was time once again to get some value out of my Harbor Freight tire changer.  An afternoon of sweat and curse words, and having to demount my new rear and remount it because I put it on backwards, and all was done.


I did take this opportunity to swap out my valve stems with some sweet aluminum 90 degree valve stems from PJsParts.com.  These make it much easier to check and adjust your tire pressure, especially the front one where the brake disks get in the way.

Everything went pretty well and I'm happy with the new tires performance so far.  We'll see how well they last.  I picked up a tread depth gauge and will be updating the following chart monthly with my rear tire measurements.  I live in Dallas and commute on the bike so we'll see the middle go out first likely.

***UPDATE BELOW***

9/7/2013 - 47214
8/19/2015 - 54640
Total miles - 7426
Noticed today the center is starting to show that it's about to separate. Still not completely to the wear bars even. I wore the PR2's well past the wear bars before this condition showed. In the end, got my money's worth since it was less than half price, but now that I have to pay for two new tires, I'm going back to the trusted Michelin PR2's.

 $264.83 shipped to my door for the PR2's via Jake Wilson again. Angel GT's would have cost $265.86 for roughly half the life.

Monday, August 26, 2013

MINI maintenance - turbo oil lines.

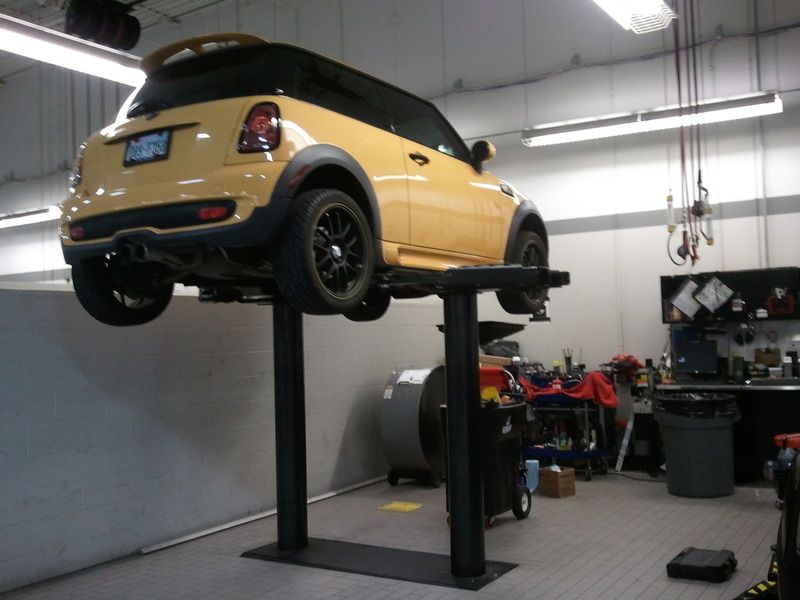
The local MINI club has a DIY day at MINI of Dallas once a quarter where we can go in and do simple jobs ourselves. They also have techs available to help us out. Last month I was there changing oil and rotating my tires....
 

Sure is nice having a lift for this type of job, even if it's just changing the oil. So I had the car down and was cleaning up preparing to finish and hand my bay and lift over to another member when one of the techs comes walking by. He snaps out his flashlight and shines it on my turbo and says "You've got an oil leak, need to take care of that soon!" I look and sure enough, there's oil there around the feed line. I go home and start to research this issue.

 As it turns out, the feed line is a hard pipe, but because there's flex and vibration, right where the hard pipe meets the part that screws into the turbo, there's a flex point with an o-ring. This part of the engine bay gets very hot and that o-ring suffers and over time the materials will break down and it will leak. No problem, I'll swap that out. Well, digging further into it, I find out it's quite the job.

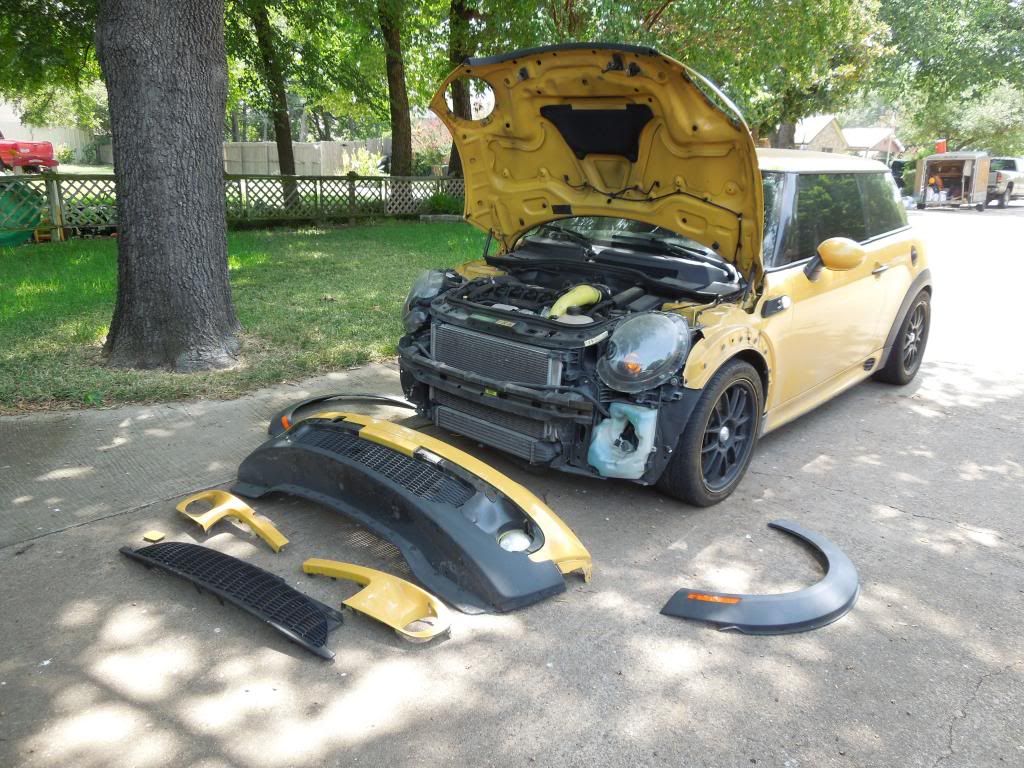
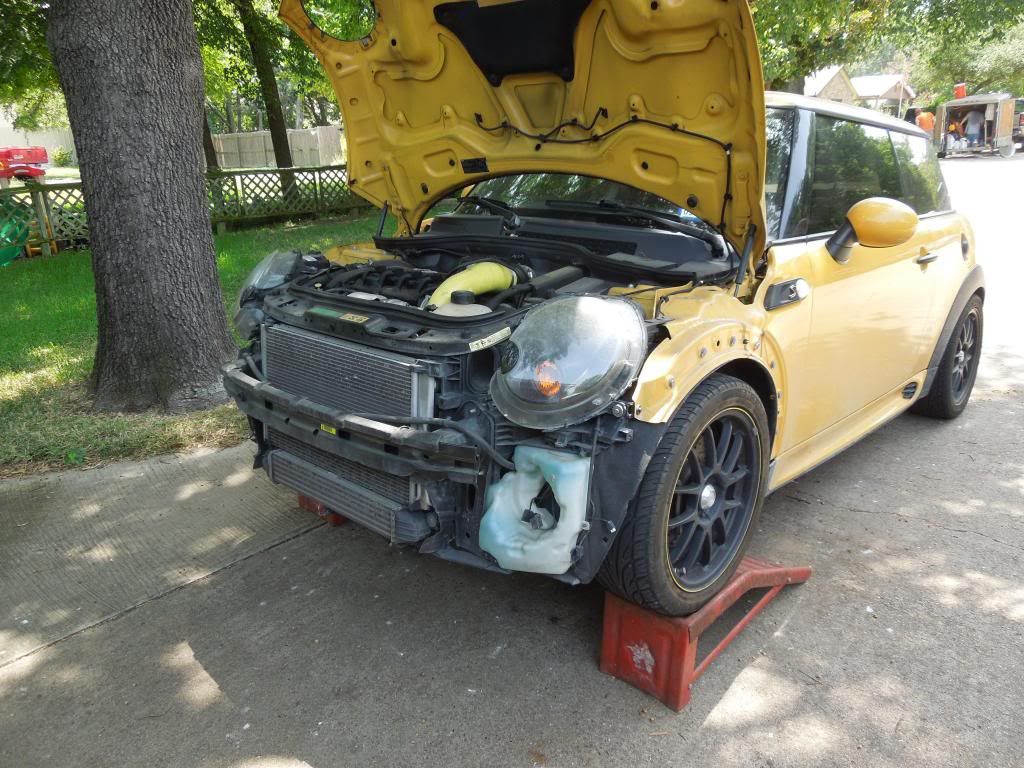
 First step, get it up on the ramps. This is a harder job than you think it would be. Due to the car being lowered, the front bumper hits the ramps before the tire does. Oh how I wish I had the lift now. Here's what it looks like to get the car up on the ramps.
 

And...we are up!
 

At this point I am already beyond halfway to getting the radiator and front end into service position so I proceed to remove the rest of the bolts to accomplish this. It's supposed to give a couple extra inches of working room in there, but mine wouldn't budge. I guess sitting there for 83K miles made it so the parts wouldn't slide apart. Oh well, I continue on.

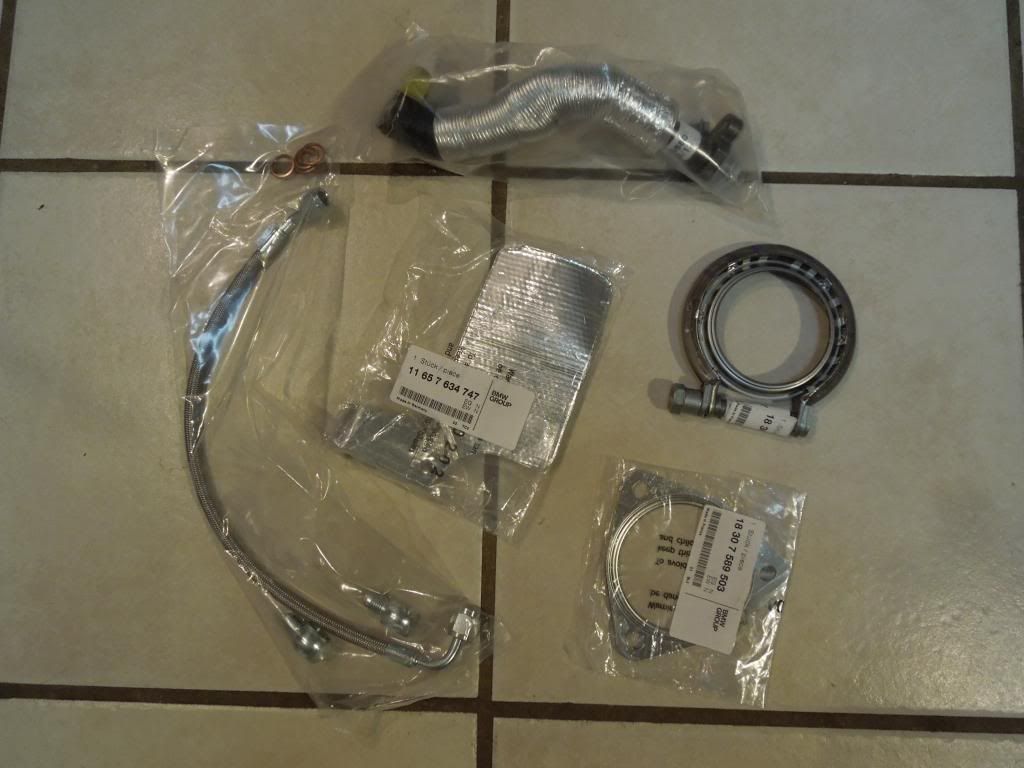
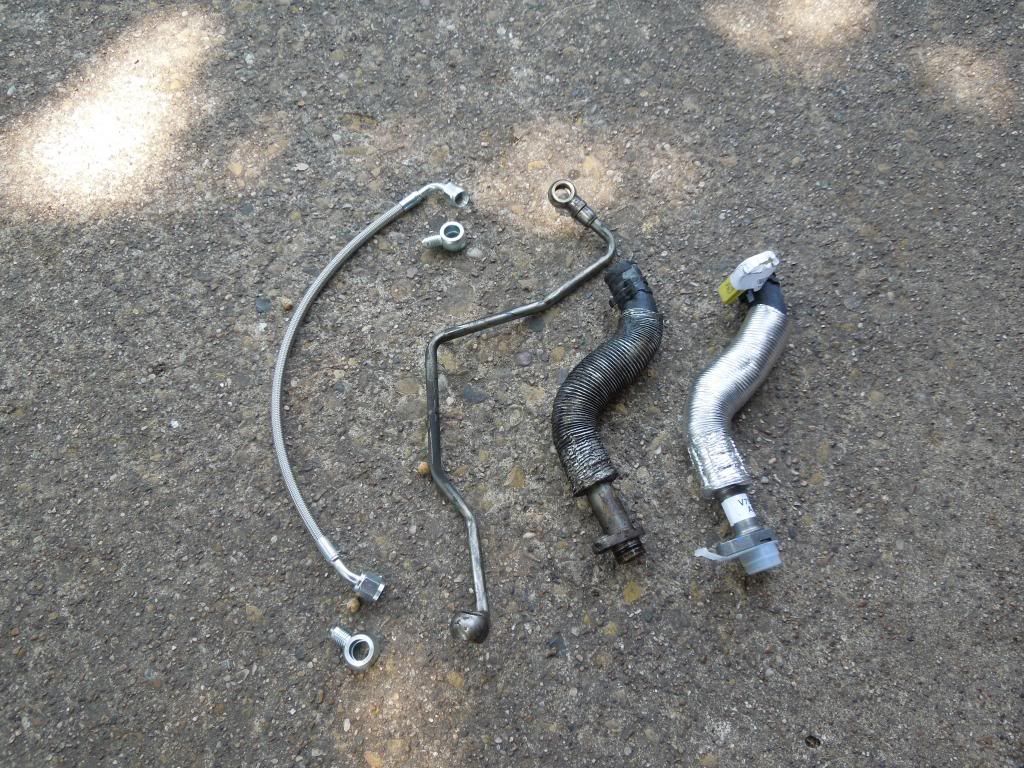
 Here's what $150.00 gets you from BMW. These are the parts I'm replacing. Actually, it's more like $170.00 for all the parts from BMW but the hard feed line is being replaced with a trick braided steel line from Detroit Tuned which eliminates the o-ring problem.  It's also a bit less expensive too.
 

I've also purchased a heat shield for the oil line that MINI started putting on the cars a couple of years after mine.  New gaskets for each side of the downpipe were also purchased to replace these items.  This was a good thing because the gasket at the turbo side wasn't reusable in it's present condition.

So, off come the heat shields first. I had one contact the wire that bolts onto the alternator from the battery and send up a small shower of sparks. Not good! Disconnect the battery and continue on. Then I had to remove the downpipe from the turbo to the exhaust pipes below. That was a trick and was one of the many times that the extra few inches of working room would have been nice with the radiator in service position.
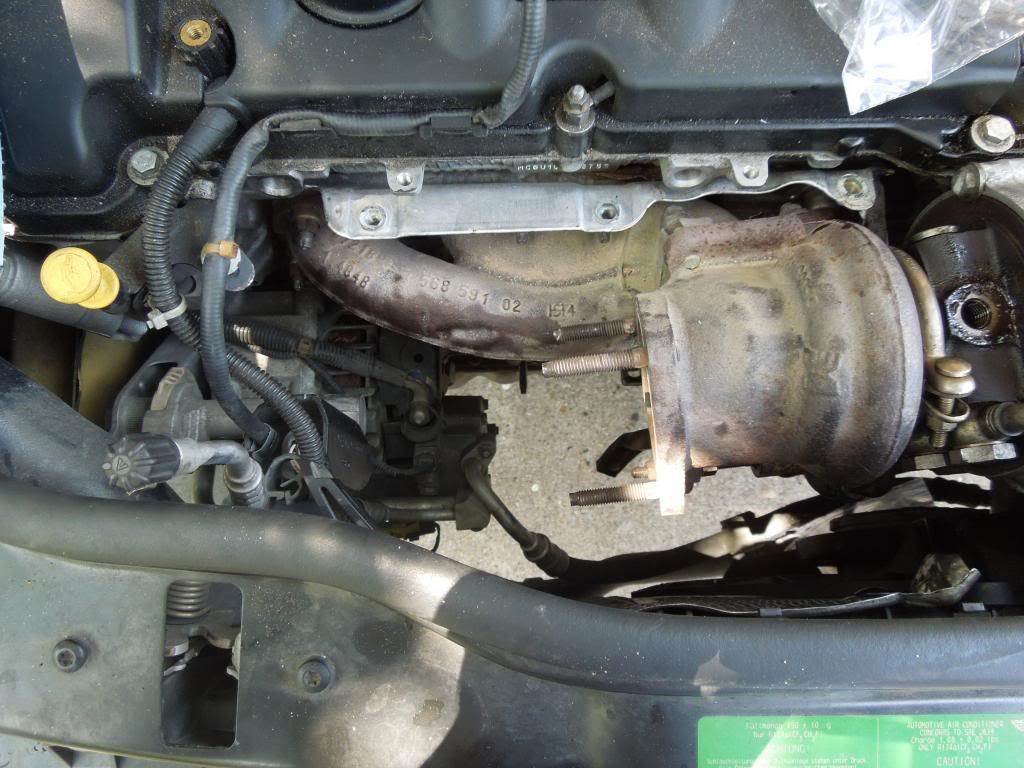
Here's the hole where the turbo downpipe used to sit.
   

Here's the parts we are after. Removing all this stuff is so that you can get to where they connect to the engine, which is very hard to get to. Old in the middle with new on the outside. Feed lines on the left, return lines on the right.
 

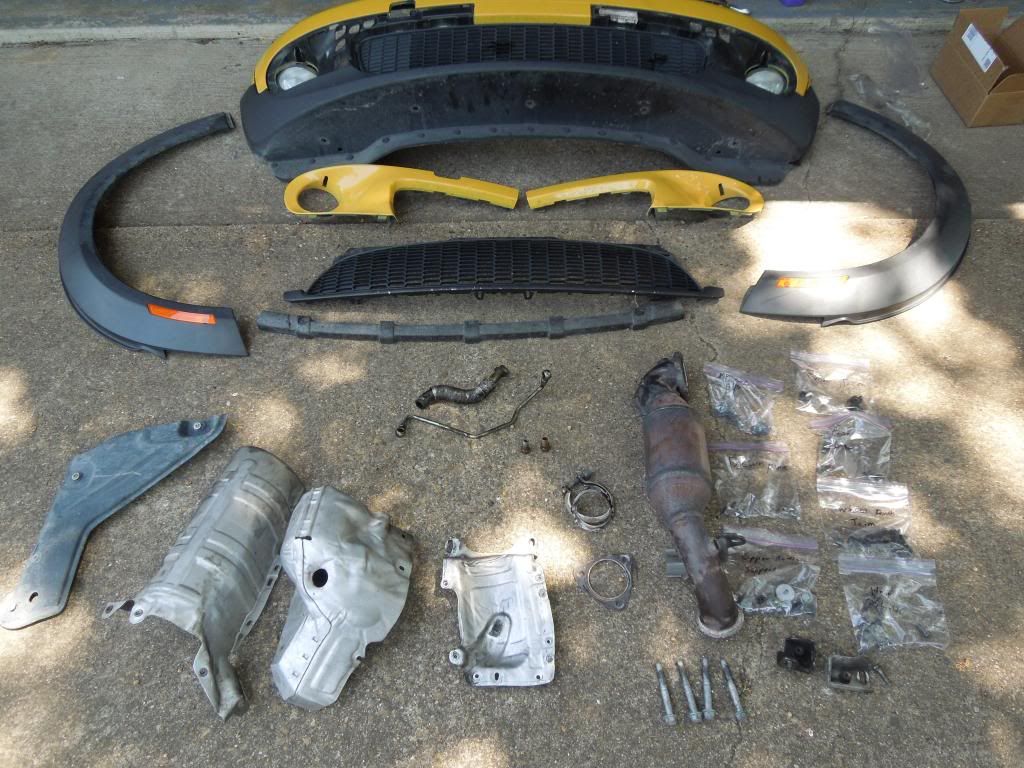
And finally, these are all the pieces I had to remove get to those parts.
 

You wouldn't think the reassembly process would go smoothly, but for the most part it did. One part didn't go so smoothly though.I was talking to my wife while screwing in the upper O2 sensor with my fingers and all went well. She went inside and I got it as tight as I could with my fingers and turned to my wrench. I turned it about a quarter of a turn and it stopped dead. I looked and it was nowhere near seated.

 I've cross threaded enough bolts over the years to know to NOT continue turning because it'll damage it, and this isn't a cheap part. So I turn it back, and it goes a quarter of a turn and stops. Ugh. Turning back and forth reveals I can only turn a full quarter turn before meeting resistance and it isn't getting any better. I decide to force it out rather than in and it took a whole lot of force to get it out. In the process I stripped all the threads off of the O2 sensor.

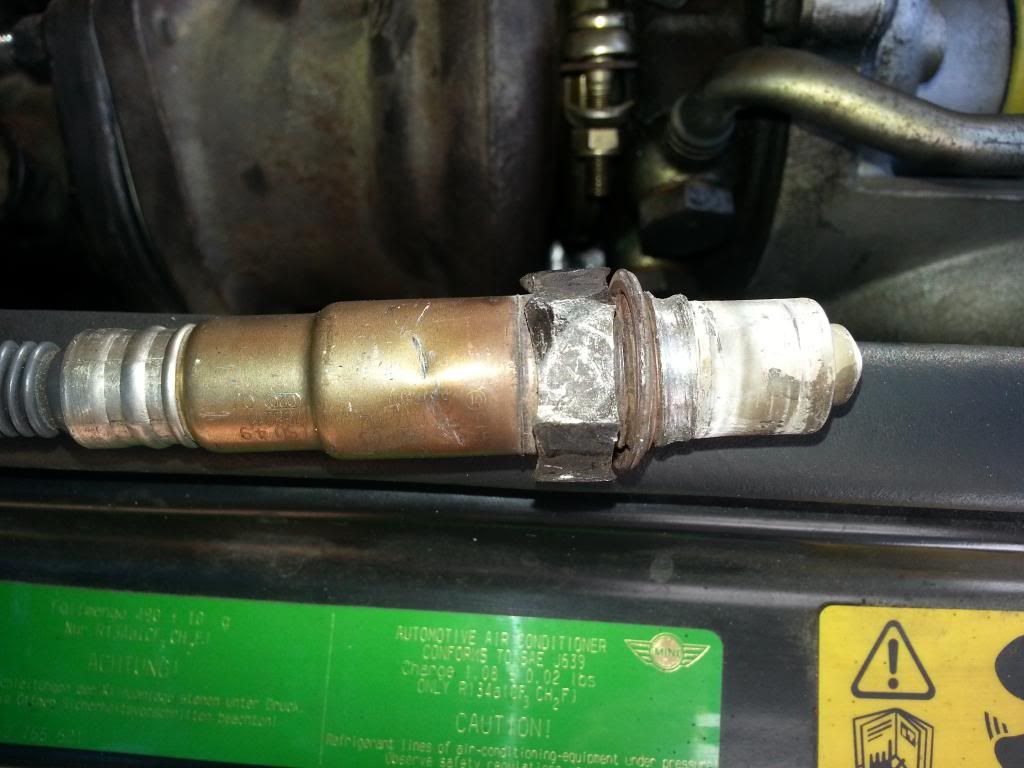
 On doing some research I find that this isn't a stock sensor from BMW and there's no way I cross threaded it with my fingers. Must have been cross threaded by one of the two previous owners I think.  Both had performed some under the hood modifications so it's quite possible.  I didn't notice if it was fully seated when I removed it. I did what I could to get it out knowing it was fubar'd but focused on not damaging anything else. Here it is out and you can see the jacked up threads.
   

$150 and a week later I have a new one at my door. I tried clearing the threads with a spark plug (same size) thread chaser but the threads were so jacked I couldn't get it to bite. I ended up going and picking up an 18mm 1.5 thread pitch tap from Elliot's Hardware Store. This bit and cleared out the softer metal from the O2 sensor in the harder threads of the downpipe.  The installation of the replacement went smoothly and I got everything back together over the weekend.

 Total down time was supposed to be just a weekend, but the sensor didn't come in till the Monday after the following weekend. Then we had family in town I didn't get time to work on it till the next weekend. CEL came on immediately but after some driving around and fiddling with the service mode on the on board computer while setting time and date again, it cleared on it's own. All running well now.

Total cost was around $300 including the O2 sensor.  Still quite the savings from the approximately $1200 this would have cost at the dealership.

Links to parts used:
http://www.detroittuned.com/detroit-tuned-turbo-oil-line-kit/
http://www.detroittuned.com/mini-cooper-s-downpipe-clamp/
http://www.detroittuned.com/mini-gen-2-cooper-s-downpipe-gasket/
http://www.detroittuned.com/mini-gen-2-turbo-oil-line-heat-sheild/

Monday, May 20, 2013

Almost broke my foot today.

Coming home from work on the FJR on Friday I got to learn something else to be careful about. I'm toodling along down the HOV lane and there's a big slowdown. After creeping along for a bit I come over a rise and see the end in sight. Turns out that some folks thought it might be amusing to cause a five car pile up during rush hour traffic and close down the HOV and two left lanes.

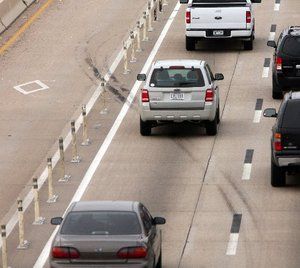
Anyway, I'm used to this and as we slog on up we get to the point where the HOV has to merge with the traffic that is also merging over. This is always balls of fun. The HOV lanes in Dallas use what I refer to as the "Picket fence system" in that we have this fencing that separates the HOV from the main lanes but going slow enough you can squeeze a full sized SUV between the vertical fence pieces. If you are uncoordinated then you can simply run the fencing down and it'll usually pop up behind you. It looks like this.


So at the merge point I pull up between the fence posts and look and a driver waves me out...wow, nice guy. What I don't realize is how close to the left fence I am. See that base on the ground? Just as I start to move forward, before I can pull my feet up, my left toe of my boot catches that base. My foot now is stopped with relation to the ground, but is moving backward with relation to the bike as well as the body which it is connected. Thank goodness for boots and retractable footpegs because my ankle swings right through the peg. However, my heel hits my exhaust pipe. For all intents and purposes my foot has now been placed between the immovable object and the unstoppable force. I got lucky though as my foot bent rotated and popped out really before I knew what happened. Hurt like all get out for about five minutes but made me realize how it could easily have been broken. Like I said, one more thing to keep an eye out for.

So, the rest of the ride was pretty much uneventful till I got a few miles from home. We were zipping along at about 70mph and suddenly the traffic in front of me slams on their brakes and we go down to 20mph really quickly. Instinctively I pull to the left as I'm hitting the brakes. Thank goodness because the car behind me finished it's deceleration with the front bumper immediately to my right. No fingers were thrown but I did turn and give him the look of death (concealed by a tinted shield) to which he promptly backed way off and changed lanes.

So, managed to learn something new and then use something already learned to survive another ride home.

Saturday, April 6, 2013

Whirlwind Trinity Trip - Day 2

Note: Click here for Day 1

DAY 2. Socorro to DFW.

I wake up a bit early to start packing up the bike. I peek out the curtains and notice that the BMW isn't there. Hrm, maybe he changed plans and left earlier. Oh well. I get the bike all packed up and head off to top off the gas tank and pick up some water to stash in the top box. As I pull out I notice the RT is across the street at Denny's.

After filling up with gas I pull back into Denny's and RT guy notices me and comes out so we are still on.


It's a short ride down to 380 and then over to the turnoff. A nice ride a few miles down and we come up on the line waiting for the gate to open at 8am.


According to some of the folks working this event, they had 1,800 people come out last year for this and were expecting more today. The folks doing this are experienced at this and it flows smoothly. One volunteer handing out flyers and four security guys checking ID's four cars at a time. When the gate opens we pretty much flow right on in. Once through the gates it's 17 miles to get to the parking lot, which is a nice easy ride with fantastic views.


First thing I want to see is the McDonald Ranch house. You have to catch a bus to that location as it's a couple miles away. This is where the guys did all of the assembly of the original plutonium core. It was damaged in in the blast but has been restored to it's original condition.


Their "Clean Room" where they did the assembly consisted of taping up the windows and making sure folks wiped their feet before coming in.


This is the hoist used to get the core into the truck for transport to the blast site.


This was a barracks and garage for the troops supporting and securing the area and operation.


One last shot of the house before heading back.


One of the first things you get to see at the site is "Jumbo" which is the shell used to contain the explosion of the dynamite in order to turn it into an implosion onto the core. This is all that remains of what was once a 25 meter long shell.


Then you make the walk out and get the picture you came all this way for, with the obelisk at ground zero.


They have on a truck a replica of "Fat Man" that was dropped on Nagasaki.


This is a piece of "Trinitite" so named for the location of the site. You can easily find these wherever the ambient temperatures managed to get hot enough to turn sand into glass.


Here's a shot looking back at the crowd around ground zero.


For the photographers, this is a place to geek out about cameras too. I saw all sorts of cameras out there in use including a couple of folks using medium format film cameras. I don't photograph photographers very often but I did have to get a shot of this guy.


Once finished, it was time for the long slog back home. Seems like on the return trip the mountain riding is shorter and the plains are longer. Thankfully I had mostly a tail wind on the way back and was getting about 46mpg without dealing with the cross winds. I did have one animal close encounter on I-20 almost back to Dallas. It was dark and I smelled him before I saw the skunk dart just in front of my front wheel. I hate to think what that would be like because I've hit them with cars but never a bike!

I'm home now, grandma is feeling a little better but will remain in the hospital for a few more days so we are taking that day by day.

End Day 2. 743 miles. Temperatures from 57F to 88F with partially cloudy skies.

Friday, April 5, 2013

Whirlwind Trinity Trip - Day 1

INTRODUCTION

This is a quick trip that has been in the works for almost two years. I stumbled upon the Trinity Site purely by accident. Someone posted a picture up on a motorcycle forum and when I went to their album on photobucket there were pictures from their ride to the Trinity Site. I started reading and knew it was something I had to do.

For those uninitiated, the Trinity Site is where the first atomic bomb was detonated. They open the area including Ground Zero, and the McDonald Ranch House where the bomb core was assembled, to the public twice per year, first Saturday in April and the first Saturday in October. I got most of my info from this very informative website -> Atomic Tourist.

I had this trip on the calendar last year in April, but our big project of the year had to be rescheduled and got dropped into the week of Trinity so I rescheduled for October. Cash flow issues as well as some family stuff got in the way and October got scrubbed. So the plan was April 2013 now. Almost didn't happen though.
I'd been discussing a different ride with a member of the FJRForum and ended up mentioning my plans for Trinity. He has been and got all excited and wanted to go again and we started making plans to meet up and head out there. My original plan of riding out on Friday, seeing Trinity on Saturday and then riding back on Sunday turned into a four day adventure seeing the mountains of NM and exploring areas of Texas with some moto camping thrown in as well. In addition, he pointed out that if we could hit Socorro in time we could head out to see the VLA. I didn't even know this was in the area but definitely wanted to see it. I was freaking excited over the plans.

Well, turns out my riding partner suffered the same fate I did last year. Unavoidable issues at work landed on his calendar causing him to be unsure he'd be able to make it. I figured I'd shorten my plans a bit then and try to make it back into a 2-3 day deal. Then Sunday before the planned trip I wake up to my son puking in bed. I take a sick day on Monday and take him to the doctors where we end up taking five x-rays to determine he doesn't have pneumonia but is sick and so is his mom. Well, at least my plans for being radiated this week came true. Tuesday night when I went to bed my throat was the size of a softball and I felt horrible. No way I can make the trip now. I take another day off on Wednesday to go to see my Doctor. They hit me with two shots including a steroid shot and a bunch of antibiotics. I can't believe how much better I felt in a few hours.

Thursday comes and I'm still not sure. I've already taken two days off from work this week and stuff is piling up on me, but this day WAS on the calendar for a LONG time. I speak to my wife and she insists that I have to go. I figure I might travel light and hit up the googles and low and behold I find me a dirtbag motel for $45 a night in Socorro NM.

So that night, you'd think I'd have a hard time sleeping because of this but really my mind was running in a zillion other directions. Then came one more stumbling block. My phone goes off, got a failed drive in one of my SAN's at work. I'm on the phone with Dell for a while and get another drive on the way and send my boss specific instructions and off to bed I go. It's 1am now and I have to be up at 5!

STORY BEGINS HERE

Day 1. DFW to Socorro.

5AM rolls around and my alarm goes off. My subconscious starts trying to talk me out of the trip because it wants more sleep. I fight through that and hop out of bed. I think to myself "I can't believe I'm really doing this!" By 5:30am I am rolling down my street off on the trip...finally!

I will say that anyone who plans a trip across West Texas and Estern New Mexico cannot complain about the putrid scenery or horrendous crosswinds. You planned the trip...you knew what to expect. I only bring this up because these two things are about all that defined the first part of my day. I do finally make it to Roswell NM, and am thoroughly disappointed. I do manage to get this picture though for the records.


Speaking to my wife, I find that her grandmother, yes, the incredible woman that I dedicated my SS1K run to by going to Tennessee to get her some BBQ from her childhood favorite restaurant, yea her...she fell and is in the hospital. Ugh, this is NOT good news. They also found a few other problems while she was in there too. At this point I'm too far to turn around now because I'm not sure I could even make the full return trip today anyway. Since I'm planning on being home tomorrow, I push on and ask my wife to keep me updated on her progress.

Well, things sure pick up on the ride after Roswell. MOUNTAINS! Woohoo! I'm grinning from ear to ear from this point forward because I can't believe I was in my bed this morning and now I'm riding in the mountains. Amazing!


I also stop to play in the volcanic lava flow at the Valley of Fire Recreation Area just outside of Carizozo


I finally to find the entrance to the Trinity Site so I can find it in the morning and continue on to Socorro where I turn towards the VLA. I've admittedly not read up enough but I know they are holding tours on Saturday which I won't be able to make. I just want to see the dang thing! I'm hoping I'll be able to get a good enough view from the road. I come over the rise and instead of having the dishes spread out over several kilometers like I heard they usually do, they've got them all clustered together! Excellent! Even better, there's a road going out toward them. I take the road and pull into a parking lot marked "VLA" and snag some pictures.


I'm quite good with the camera timer so I play around trying to get me in the shot too.


Well, I'm geeking out when I pull out of the parking lot and decide to go right and keep going down the road to see where it goes. Low and behold, there's the visitors center and it's open daily till sunset! Who operates on hours like that? I couldn't even hope for the USS Alabama to operate on those kinds of hours. I pull into the semi-full parking lot and go inside where I see directions for the self guided walking tour (with apology for missing placards as they upgrade them) so I start following signs. Holy crap, they let you walk right up to them!


I'm totally geeking out and taking pictures like a madman. I have to admit though, I'm not much of an astronomy guy. However, while I never finished my degree, there's an engineer lurking inside of me that was having a ball. Reading up on the precision of the construction, the cryogenic processes and then watching them all move in sync as they work together to track signals across the sky. I can't stop grinning at this. Then I go picture crazy.


Finally I wind down and it's time to start heading back to town but I have one more stop to make. We'd planned on camping at a place called "The Box" recreation area. I couldn't find much info online except that it's free to camp, mostly used by rock climbers, and is between the VLA and Socorro. This means I should probably check it out since I'm here. I'm happy that this gives me the opportunity to take the FJR off the pavement for a bit of play.


And this is as far as this rider and bike will be going. End of our road.


I get back and check into my hotel. It's not totally dirtbag, but it does feel like a $45 a night hotel. There's a BMW RT in the parking lot I note. While I'm pulling my bags off the bike and taking them inside the owner comes over and introduces himself. He's an advrider guy and headed to the Trinity in the morning. After a few quick words we have plans to head out together at 7:30 in the morning. Woohoo!

End Day 1. 799 miles. Temperature swing from 36F to 86F with sun partially obscured by clouds throughout the day.

 Note: Click here for Day 2.
Tuesday, March 19, 2013

Windows scheduled reboot


This is a command I use a lot.  Many times I'll need to have a server reboot later at night, and then I forget to actually reboot it.  I could set a reminder on my phone but why do that when there are tools to do it for you.

Run this from a command line with the time and date you want the machine to reboot.

schtasks /create /tn "Reboot" /tr "shutdown /r /t 1" /sc once /st 22:00:00 /sd 03/05/2013 /ru "System" /z

schtasks is the command line software for scheduling tasks.  This is needed when you are trying to run something as System since you can't set that from the GUI.

More info here -> http://www.microsoft.com/resources/documentation/windows/xp/all/proddocs/en-us/schtasks.mspx?mfr=true

/create - creates the task.
/tn - the name of the task.
/tr - the command
/sc - the frequency, here I use "once" since I don't want a nightly reboot.
/st - the time for the command to run
/sd - the date for the command to run.
/ru - the user to run as, in this case System.
/z - delete the scheduled task once it has run.  This only works on certain OS's.

For the shutdown command....
/r - reboot
/t - how many seconds to wait, in this case, 1.